If you’re looking for a way to bring warmth, texture, and timeless charm into your home, Shinnoki Milk Oak might be the perfect choice. With its soft, natural tones and smooth grain, this pre-finished wood veneer is ideal for creating a modern farmhouse aesthetic, blending classic craftsmanship with contemporary style. Whether you’re updating cabinetry, walls, or furniture, this step-by-step guide will help you incorporate Shinnoki Milk Oak into your home with a touch of Joanna Gaines-inspired charm.
Step 1: Understanding the Appeal of Shinnoki Milk Oak
Before diving into installation, let’s talk about why Shinnoki Milk Oak is making waves in interior design.
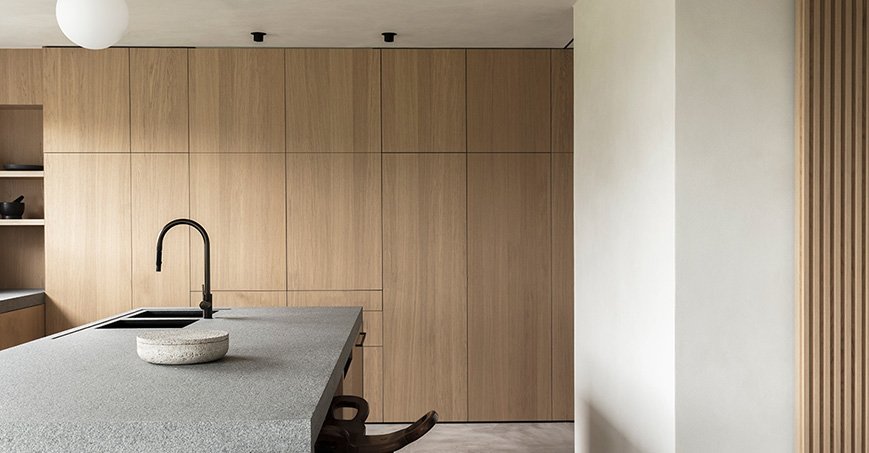
✔ Neutral, Warm Tones – A light oak finish that pairs beautifully with white, gray, and earthy accents.
✔ Smooth & Textured Options – Adds depth without overwhelming a space.
✔ Pre-Finished & Easy to Work With – Reduces labor time while ensuring a high-end look.
✔ Versatile Use – Perfect for cabinetry, feature walls, and even custom furniture.
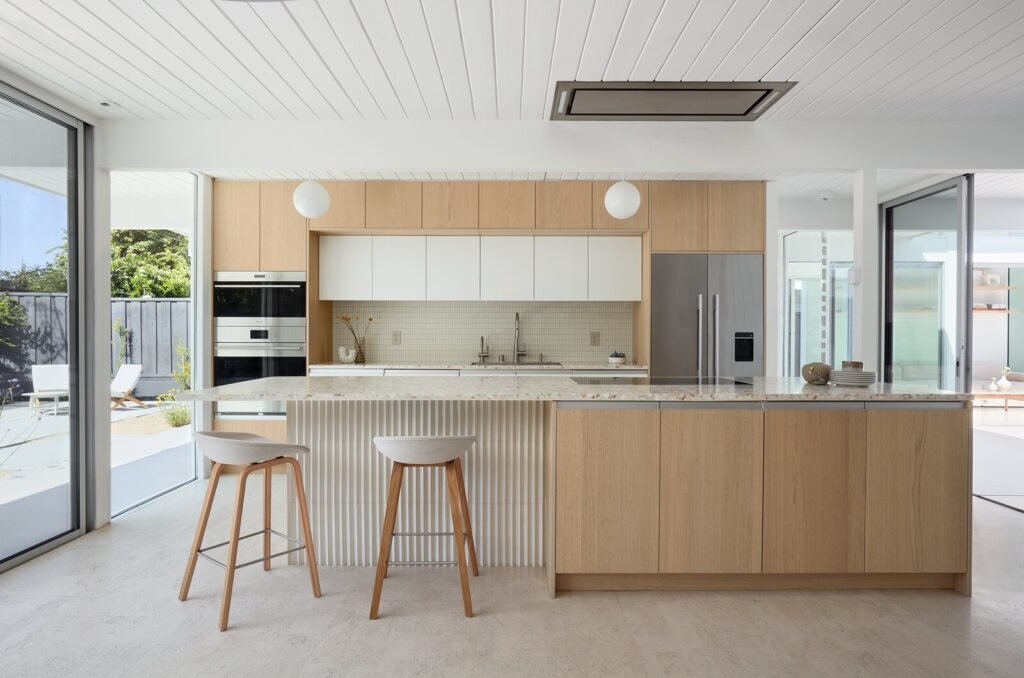
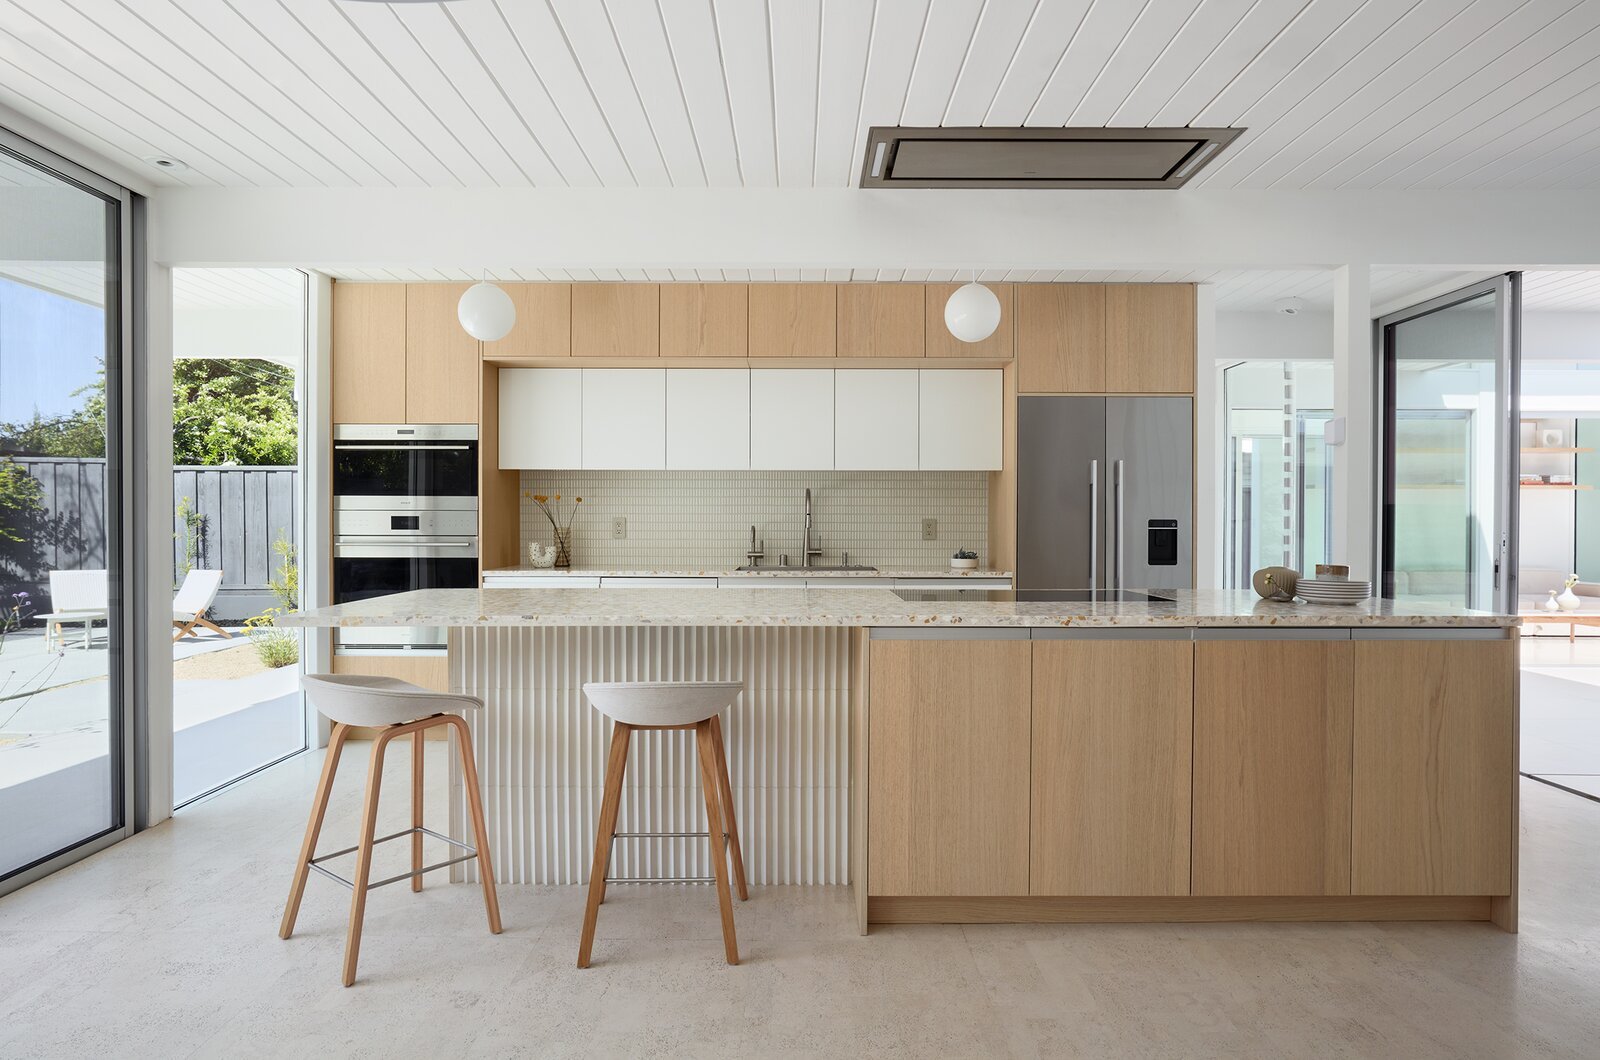
💡 Pro Tip: Use Shinnoki Milk Oak for kitchen islands, built-ins, or accent walls to create a natural, seamless design flow.
Step 2: Choosing the Right Applications
Shinnoki Milk Oak is highly versatile, but choosing where to use it can make a huge difference in your home’s overall aesthetic. ✔ Kitchen Cabinets & Islands – A modern take on classic wood cabinetry. ✔ Feature Walls – A great way to add warmth and character to bedrooms or living spaces. ✔ Built-Ins & Storage Units – Perfect for creating stylish, functional storage solutions. ✔ Floating Shelves & Custom Furniture – A subtle yet elegant touch.
💡 Pro Tip: Pair Milk Oak with matte black hardware or brass fixtures for a modern farmhouse look.
Step 3: How to Incorporate Shinnoki Milk Oak into Your Home
Once you’ve chosen your application, follow these steps for a smooth installation.
1. Prepare the Surface
- Ensure that the surface where you’ll apply Shinnoki Milk Oak is clean and dry.
- If covering existing cabinets, lightly sand the surface for better adhesion.
2. Measure & Cut
- Use a fine-tooth saw or veneer trimmer to cut the wood veneer to size.
- For built-ins or feature walls, map out the layout first to ensure a cohesive pattern.
3. Secure & Attach
- If applying to cabinetry, use wood glue or adhesive strips for a firm hold.
- For large wall installations, use a nail gun or construction adhesive to prevent warping.
- Make sure all edges are flush and smooth before sealing.
4. Finishing Touches
- Add soft-close hinges and matte handles for a seamless, high-end cabinet look.
- Apply a light protective sealant if using on high-traffic surfaces.
- Complement the wood tones with neutral wall colors and textured fabrics.
💡 Pro Tip: If using Shinnoki Milk Oak in a kitchen, install under-cabinet lighting to highlight the natural grain.
Step 4: Styling Your Space with Shinnoki Milk Oak
Once installed, it’s time to bring in complementary elements to complete the design.
✔ Color Palette: Soft whites, warm grays, muted greens, and earthy tones.
✔ Textures: Mix with linen, rattan, and iron for a cozy, balanced look.
✔ Decor: Keep it minimal with vintage-inspired accents or modern farmhouse décor.
✔ Lighting: Black pendant lights or recessed lighting can enhance the natural wood tones.
💡 Pro Tip: Pair Milk Oak cabinetry with a white quartz countertop for a clean, elegant contrast.
Step 5: Where to Source Shinnoki Milk Oak
If you’re ready to integrate this beautiful material into your home, check out these sources:
✔ Local Lumber & Veneer Suppliers – Offers custom cuts and wholesale pricing.
✔ Home Design Showrooms – View samples and see the finish in different lighting.
✔ Online Specialty Stores – Many vendors ship pre-cut panels for DIY projects.
✔ Custom Cabinet Makers – Work with a pro to create one-of-a-kind pieces.
💡 Pro Tip: Always request samples before committing to a large order to ensure the tone complements your space.
Read More in Home Remodel ProZ Blog
- Kitchen Showrooms Near Me: Your FAQ Guide to the Latest Design Trends
 Looking for a kitchen showroom near you? Explore this FAQ guide to find the best showrooms, discover modern kitchen trends, and get expert remodeling tips.
 - Shinnoki Cabinets: A Comparison of Chip Gaines and Jeff Devlin’s Design Approaches
 Thinking about Shinnoki cabinets for your kitchen? This guide compares Chip Gaines’ farmhouse aesthetic with Jeff Devlin’s master craftsmanship, helping you decide the best style for your home.
 - How to Design with Shinnoki Milk Oak: A Step-by-Step Guide Inspired by Joanna Gaines
 Got kitchen plumbing problems in Sacramento? This budget-friendly DIY guide walks you through
Final Thoughts: Elevate Your Home with Timeless, Natural Beauty
Shinnoki Milk Oak is a versatile, stylish, and easy-to-work-with material that can transform any space with its warm, organic feel. Whether you’re going for a modern farmhouse, Scandinavian, or contemporary aesthetic, this material blends seamlessly into a variety of design styles.
✔ Use it for cabinetry, feature walls, and furniture for a timeless touch.
✔ Pair it with neutral tones and simple textures to let the wood shine.
✔ Follow these easy installation steps for a professional-quality result.
Ready to give your home a Joanna Gaines-inspired upgrade? Start planning your Shinnoki Milk Oak project today!